Blog
Optimize Your Vape Maintenance Workflow for 2025 Success
Aug
Vape devices promise convenience but keeping them clean is anything but simple. Most users do not realize that using isopropyl alcohol with at least 91 percent concentration is the only way to truly sanitize a vape. Think grabbing any old rag will do the trick? Actually, the right supplies and a smart, step-by-step routine decide whether your device lasts or fails early.
Table of Contents
- Step 1: Gather Essential Cleaning Supplies
- Step 2: Disassemble Your Vape Device Carefully
- Step 3: Clean Components Thoroughly With Recommended Solutions
- Step 4: Reassemble Your Device And Test For Functionality
- Step 5: Implement A Regular Maintenance Schedule
Quick Summary
| Key Point | Explanation |
|---|---|
| 1. Gather essential cleaning supplies | Assemble items like isopropyl alcohol, cotton swabs, and gloves before starting maintenance. This ensures an efficient cleaning process. |
| 2. Disassemble with care | Understand your device’s components and carefully separate them while maintaining organization. This prevents damage during cleaning. |
| 3. Use effective cleaning solutions | Clean components with high-concentration isopropyl alcohol, applying it with cotton swabs and cloths for thorough maintenance without damaging parts. |
| 4. Reassemble systematically | Put components back in their correct order after cleaning, ensuring seals and gaskets are properly oriented to avoid leaks. |
| 5. Implement a regular maintenance schedule | Schedule bi-weekly cleanings and weekly inspections to sustain device performance and longevity, tailoring it to your usage habits. |
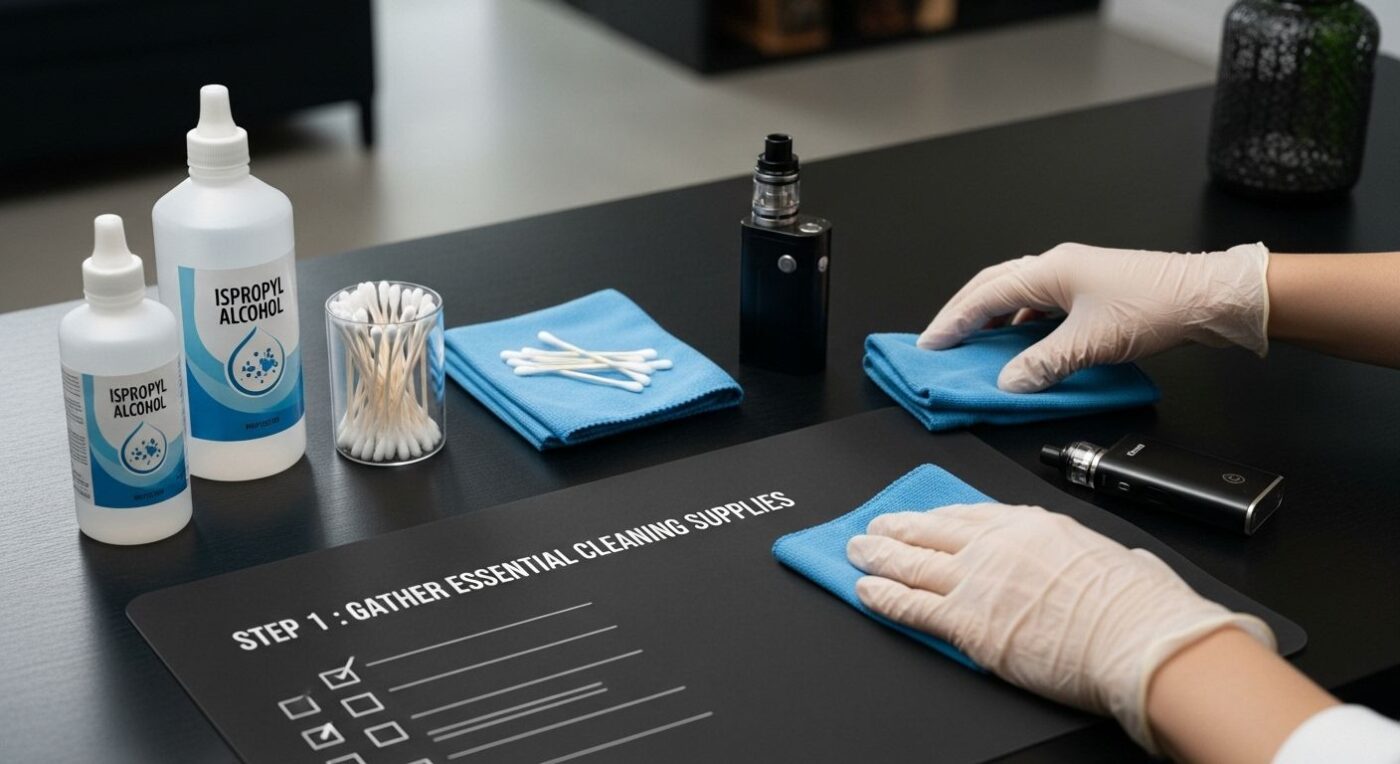
Step 1: Gather Essential Cleaning Supplies
Optimizing your vape maintenance workflow begins with strategic preparation, specifically assembling the right cleaning toolkit. Successful maintenance depends on having precise, specialized tools ready before you start the cleaning process. This initial step sets the foundation for comprehensive vape device care and ensures you can address potential issues efficiently.
Selecting the Right Cleaning Materials
Your cleaning arsenal should include several targeted components designed specifically for electronic vaping devices. Isopropyl alcohol (at least 91% concentration) serves as the primary cleaning solution, effectively breaking down residual concentrate buildup and sanitizing internal components. Cotton swabs, microfiber cloths, and precision cleaning brushes with soft bristles will help you navigate the intricate parts of your vaping device without causing damage.
Procure disposable gloves to protect your hands from potentially sticky residues and maintain a hygienic workspace. A clean, well-lit workspace with a flat surface provides the optimal environment for thorough device maintenance. According to Washington State Department of Health, safety begins with careful product selection and workspace preparation.
Essential Cleaning Toolkit Inventory
Before beginning your maintenance routine, verify you have the following items:
- High-concentration isopropyl alcohol (91% or higher)
- Cotton swabs
- Microfiber cleaning cloths
- Precision cleaning brushes
- Disposable gloves
- Soft, lint-free paper towels
- Small plastic container for soaking components
- Workspace covered with paper or disposable protective surface
By methodically gathering these supplies, you transform your vape maintenance workflow from a potentially frustrating experience into a systematic, controlled process. Each tool serves a specific purpose, enabling you to disassemble, clean, and reassemble your device with professional precision. Remember that thorough preparation prevents potential damage and extends your device’s operational lifespan.
To help you prepare for maintenance, here is a table that organizes the recommended cleaning toolkit with each item[NULL]27s main purpose. Keep this checklist handy before starting your workflow.
| Cleaning Supply | Specification / Type | Purpose |
|---|---|---|
| Isopropyl alcohol | 91% concentration or higher | Dissolves residue and sanitizes components |
| Cotton swabs | Disposable, precision tip | Cleans small crevices and tight areas |
| Microfiber cloths | Soft, lint-free | Wipes and polishes delicate surfaces |
| Precision cleaning brushes | Soft-bristled | Scrubs intricate parts without scratching |
| Disposable gloves | Nitrile or latex | Protects hands and maintains hygiene |
| Paper towels | Soft, lint-free | Drying and protecting workspace |
| Small plastic container | Clean, non-metallic | Soaks removable parts |
| Protective workspace covering | Paper or disposable surface | Keeps work area clean and parts organized |
Step 2: Disassemble Your Vape Device Carefully
Disassembling your vape device represents a critical phase in your maintenance workflow, requiring precision, patience, and a systematic approach. This step transforms routine cleaning from a potentially frustrating experience into a methodical process that preserves your device’s functionality and extends its operational lifespan.

Understanding Device Components
Before beginning disassembly, familiarize yourself with your specific vape device’s unique configuration. Different models have varying mechanisms for component separation, so consulting your device’s user manual or manufacturer guidelines provides the most accurate roadmap. Generally, most vape devices can be broken down into key segments: the battery section, atomizer, mouthpiece, and tank or cartridge.
Start by ensuring your workspace is clean, well-lit, and organized. Place a soft microfiber cloth or paper towel on your work surface to prevent scratching delicate components and to catch any small parts that might accidentally drop. Wear your disposable gloves to maintain hygiene and protect sensitive device elements from skin oils and potential contamination.
Systematic Disassembly Process
Begin with the battery section, carefully unscrewing or detaching it from other components. If your device has a removable battery, extract it carefully, ensuring no liquid residue is present. Next, focus on the atomizer or heating element. Gently unscrew the mouthpiece, then separate the tank or cartridge. For devices with integrated components, use minimal force and follow a gentle twisting motion.
Pay close attention to the orientation and positioning of each part. Arrange the disassembled components in the order they were removed, which will simplify reassembly later. According to Environmental Protection Agency guidelines, proper handling during disassembly is crucial for both device maintenance and environmental safety.
Key verification steps to confirm successful disassembly include:
- All components are separated without force
- No visible damage to threading or connection points
- Parts are clean and free from residual concentrate
- Components are laid out in a logical, organized manner
Remember that patience is your greatest tool during this process. Rush, and you risk damaging expensive device components. Move slowly, be deliberate, and treat each part with careful attention. Your methodical approach now sets the stage for thorough cleaning and optimal device performance in subsequent maintenance steps.
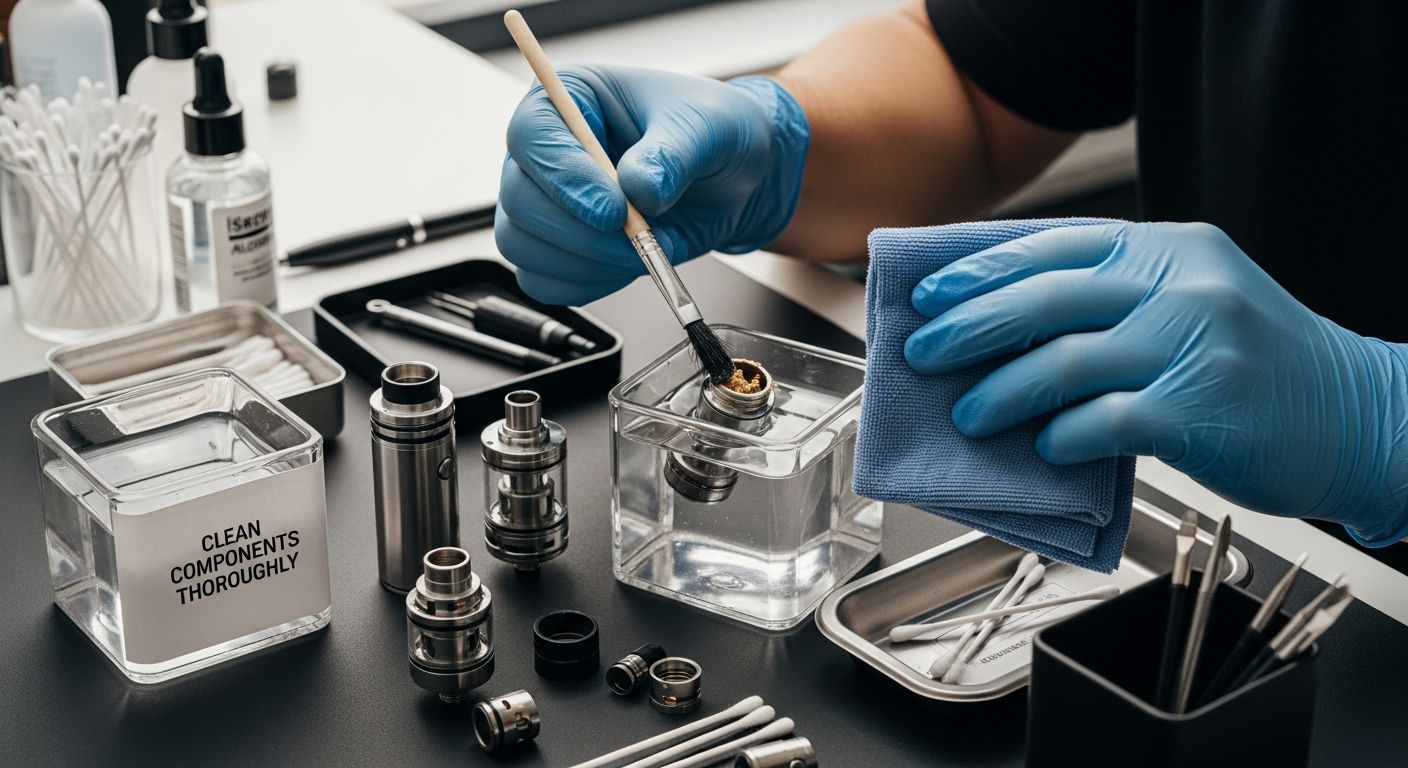
Step 3: Clean Components Thoroughly with Recommended Solutions
Cleaning your vape device components transforms routine maintenance into a precision operation that safeguards performance and extends device longevity. This critical step requires methodical approach, selecting appropriate cleaning solutions and applying them with calculated technique to remove residual concentrates, prevent buildup, and maintain optimal functionality.
Preparing Cleaning Solutions
High-concentration isopropyl alcohol (91% or higher) serves as the primary cleaning agent, effectively dissolving sticky concentrate residues without leaving harmful chemical traces. Create a dedicated cleaning station with small containers filled with isopropyl alcohol, ensuring each component can be individually submerged or carefully wiped. Separate plastic, metal, and electronic components to prevent potential cross-contamination or material degradation.
Begin by using cotton swabs lightly saturated with isopropyl alcohol to gently clean intricate areas like connection points, threading, and hard-to-reach crevices. For removable components like tanks and mouthpieces, prepare a small bath of isopropyl alcohol where they can soak briefly. Avoid fully submerging electronic elements like battery connections, focusing instead on precise, targeted cleaning techniques.
Systematic Cleaning Technique
Approach each component with deliberate, careful motions. Use soft-bristled brushes and microfiber cloths to remove accumulated residue without scratching delicate surfaces. For atomizers and heating elements, use minimal liquid and focus on gentle, precise movements. Rotate and inspect components from multiple angles, ensuring thorough coverage without excessive moisture.
According to research published in the International Journal of Environmental Research and Public Health, proper cleaning is essential for reducing microbial contamination and maintaining device integrity.
Verification steps to confirm thorough cleaning include:
- No visible residue on any component
- Clean, streak-free surfaces after alcohol application
- Components appear restored to near-original condition
- No lingering odors from previous concentrate usage
- All parts are completely dry before reassembly
Patience distinguishes exceptional maintenance from rushed, ineffective cleaning. Take your time, move deliberately, and remember that meticulous attention now prevents potential performance issues later. Each careful wipe and precise motion contributes to maintaining your device’s optimal functionality and extending its operational lifespan.
Step 4: Reassemble Your Device and Test for Functionality
Reassembling your vape device marks the culmination of your meticulous maintenance workflow, transforming carefully cleaned components back into a fully operational system. This critical step requires precision, patience, and a systematic approach to ensure every element returns to its original configuration with optimal performance potential.
Methodical Reassembly Process
Begin by reviewing the components you previously disassembled, mentally reconstructing their original positioning. Start with the base components first, typically reconnecting the battery section or power unit. Carefully align threading and connection points, using gentle, even pressure to avoid cross-threading or damaging delicate interfaces. Each component should seat smoothly, with no excessive force required.
Pay close attention to the orientation of gaskets, seals, and O-rings, which are crucial for maintaining proper device integrity and preventing potential leaks. These small components often get overlooked but play a significant role in overall device performance. Ensure they are clean, undamaged, and positioned correctly during reassembly.
Functionality Verification
Once reassembled, conduct a comprehensive functionality test before full operational use. Initial testing should be performed without introducing concentrate, focusing instead on basic electrical and mechanical performance. Check connection points, verify smooth button activation, and confirm that all components are securely fastened. Listen for any unusual sounds and observe any unexpected behaviors that might indicate incomplete cleaning or improper reassembly.
According to National Institute on Drug Abuse research, understanding the intricate components of vaping devices is crucial for proper maintenance and functionality.
Critical verification steps include:
- Smooth, consistent button activation
- No visible gaps between components
- Secure, tight connections at all interface points
- No unusual sounds during initial power-on
- Battery charges and holds charge correctly
- No signs of liquid leakage
Remember that patience during reassembly prevents potential device failure. Take your time, move deliberately, and trust the systematic approach you’ve followed throughout the maintenance process. Each careful connection brings you closer to restoring your device to peak performance, ensuring a reliable and enjoyable vaping experience.
Step 5: Implement a Regular Maintenance Schedule
Establishing a consistent maintenance schedule transforms occasional device care into a systematic approach that protects your investment and ensures optimal vaping performance. This final step bridges your immediate cleaning efforts with long-term device preservation, creating a proactive workflow that anticipates potential issues before they compromise your device’s functionality.
Creating Your Maintenance Timeline
Frequency is key in effective device maintenance. For moderate users, a comprehensive cleaning routine should occur every two weeks, with quick interim maintenance performed weekly. Consider your individual usage patterns as the primary determinant of maintenance intensity. Heavy users might require more frequent interventions, while occasional users can extend their maintenance intervals.
Develop a personalized maintenance calendar that integrates cleaning sessions with your regular schedule. Digital calendar reminders or smartphone apps can help track these maintenance windows, ensuring you never overlook critical device care. Mark specific dates for thorough cleaning, quick inspections, and battery performance checks. Consistency turns maintenance from a sporadic task into a reliable habit that protects your device’s longevity and performance.
Maintenance Documentation and Tracking
Maintain a simple log documenting each maintenance session. Record the date, cleaning process performed, any observed issues, and component replacements. This documentation serves multiple purposes beyond simple record-keeping. It helps you track your device’s performance trajectory, identify potential recurring problems, and create a historical maintenance profile that can inform future care strategies.
According to Oregon Health Authority guidelines, proper device maintenance is crucial for safe and responsible usage.
Essential maintenance schedule components include:
- Bi-weekly comprehensive cleaning
- Weekly quick inspections
- Monthly battery performance evaluation
- Immediate attention to any performance irregularities
- Replacement of worn components as needed
- Annual professional device assessment
Remember that your maintenance schedule is a living document. Remain flexible and willing to adjust based on your device’s specific needs, usage patterns, and performance characteristics. Treat your maintenance routine as a dynamic process of continuous improvement, not a rigid, unchangeable protocol. By adopting this adaptive approach, you ensure your device remains in peak condition, delivering consistent, high-quality performance throughout its operational lifecycle.
Below is a summary checklist to help you verify each critical step during the cleaning, reassembling, and maintenance of your vape device. Use this table as a reference to ensure no essential step is missed throughout your workflow.
| Step | Verification Criteria |
|---|---|
| Disassembly | All components separated without force; no damage to threading or points; organized layout |
| Cleaning | No visible residue; clean, streak-free surfaces; no lingering odors; all parts completely dry |
| Reassembly | Smooth button activation; no visible gaps; secure connections; correct gasket placement; no leaks |
| Functionality Test | Battery charges properly; no unusual sounds; correct electrical response; no liquid leakage identified |
| Maintenance Scheduling | Bi-weekly deep cleanings; weekly quick inspections; monthly battery evaluations; timely component replacements |
Upgrade Your Vape Experience by Combining Maintenance Know-How with Shorties Disposable Solutions
Are you tired of the hassle and uncertainty that comes with cleaning, disassembling, and troubleshooting your vape device? You already know how important it is to keep your equipment spotless and functional, but it can be overwhelming to find reliable products that support all the best practices outlined in our vape maintenance guide. Shorties Disposable is designed for vapers like you who demand both convenience and top-tier performance, eliminating the guesswork around safety, potency, and authenticity.

Browse Shorties Disposable’s collection now for premium, high-capacity, lab-tested vape devices that make your maintenance workflow effortless and your sessions dependable. Choose a solution that aligns with your 2025 success goals. Shop today at https://shortiesdisposablevape.com and experience the difference true quality makes.
Frequently Asked Questions
How often should I clean my vape device?
For moderate users, a comprehensive cleaning should occur every two weeks, with quick interim maintenance performed weekly. Heavy users might require more frequent cleanings, while occasional users can extend their intervals.
What cleaning supplies do I need for vape maintenance?
Your essential cleaning supplies include high-concentration isopropyl alcohol (91% or higher), cotton swabs, microfiber cloths, precision cleaning brushes, disposable gloves, and small containers for soaking components.
How can I ensure a thorough cleaning of my vape components?
To achieve a thorough cleaning, use cotton swabs soaked in isopropyl alcohol for small crevices, soak removable parts briefly in alcohol, and use soft-bristled brushes and microfiber cloths to avoid scratching delicate surfaces.
What steps should I follow to safely disassemble my vape device?
Start by ensuring your workspace is clean and well-lit. Use your gloves, and follow your device’s user manual for specific disassembly instructions, ensuring all components are carefully separated without force.
Recommended
- SHORTIES DISPOSABLE VAPE – THE OFFICIAL WEBSITE
- Shorties Disposable Lava Cake – SHORTIES DISPOSABLE VAPE
- Refund and Returns Policy – SHORTIES DISPOSABLE VAPE
- Shorties Disposable Apple Fritter – SHORTIES DISPOSABLE VAPE
Article generated by BabyLoveGrowth