Blog
Step by Step Vape Maintenance for Optimal Performance
Sep
Keeping a vape device running smoothly is all about precision and the right setup. Here is something most people overlook. Using isopropyl alcohol with at least 91 percent concentration is the number one tool for deep, residue-free cleaning. But most folks focus on fancy gadgets instead of this simple solution that pro technicians swear by. The real secret to a long-lasting vape is not in complicated maintenance but in building the perfect cleaning kit from the start.
Table of Contents
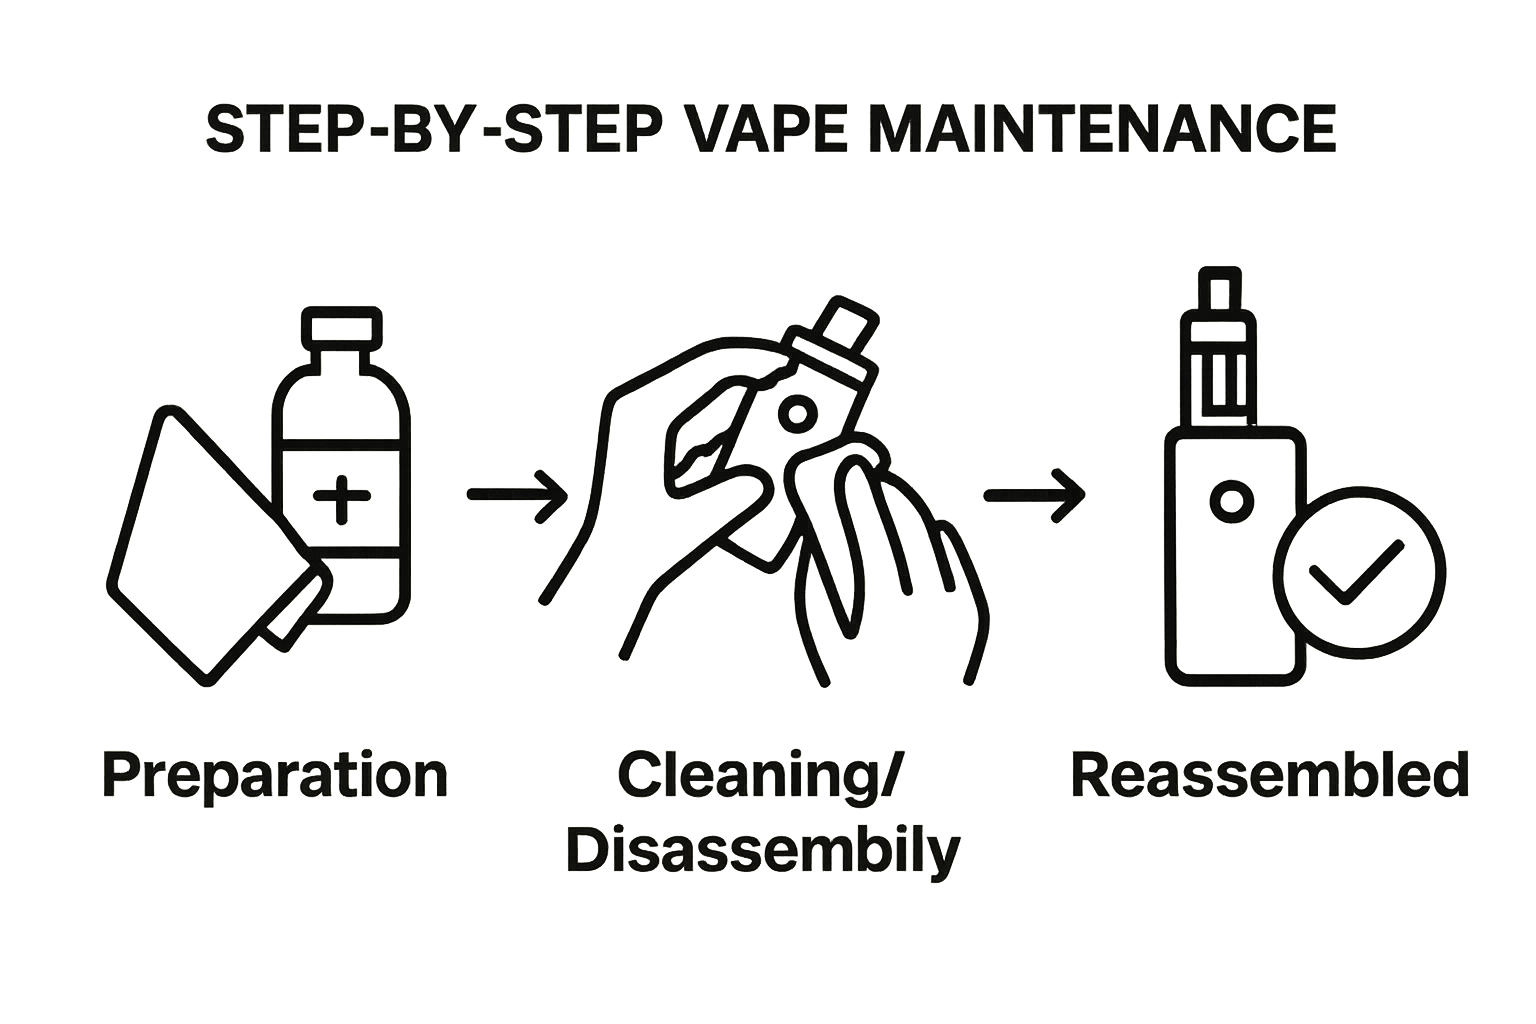
- Step 1: Gather Your Vape Maintenance Supplies
- Step 2: Disassemble Your Vape Device Properly
- Step 3: Clean Each Component Thoroughly
- Step 4: Reassemble Your Vape Device Correctly
- Step 5: Test For Functionality After Maintenance
Quick Summary
| Key Point | Explanation |
|---|---|
| 1. Gather necessary maintenance tools | Assemble isopropyl alcohol, microfiber cloths, and precision tools for effective vape cleaning. |
| 2. Disassemble with caution | Power down and carefully separate components, noting their arrangement for accurate reassembly. |
| 3. Clean all parts thoroughly | Use alcohol and appropriate tools to clean connection points and parts, preventing residue buildup. |
| 4. Reassemble carefully and methodically | Follow your notes or photos, ensuring each component aligns and connects correctly without misalignment. |
| 5. Perform a functionality test | Check for smooth operation, consistent vapor production, and secure connections after reassembly. |
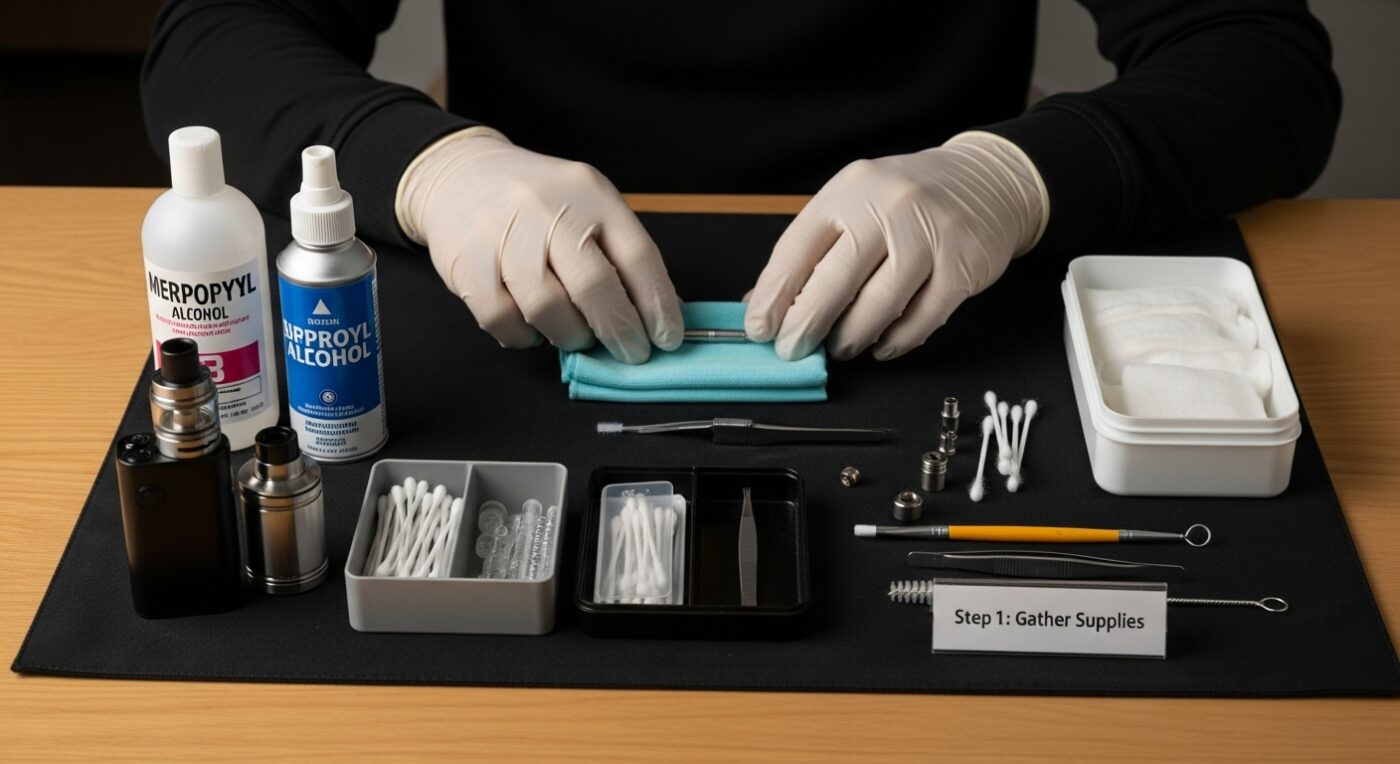
Step 1: Gather Your Vape Maintenance Supplies
Preparing for effective vape maintenance starts with assembling the right tools and resources. Think of this process like prepping for a precise medical procedure or a delicate electronics repair. You will need specific items that ensure your vape device remains in top condition and performs optimally.
The core of successful vape maintenance requires a curated collection of specialized tools. Start by gathering isopropyl alcohol (91% or higher concentration), which serves as your primary cleaning solution. This high-grade alcohol effectively dissolves residue and sanitizes internal components without leaving harmful chemical traces. Next, collect soft, lint-free microfiber cloths that will help you clean delicate surfaces without scratching or leaving fibers behind.
Your maintenance toolkit should also include precision tools. A set of small tweezers with non-conductive tips allows you to handle delicate electronic components safely. Cotton swabs will help you reach tight spaces and clean intricate areas of your vape device. Additionally, procure a small brush with soft bristles specifically designed for electronic cleaning. This will help you remove dust and debris from hard-to-reach areas without causing damage.
Read our comprehensive guide on optimizing vape maintenance workflow for more advanced techniques and professional insights. When selecting your maintenance supplies, prioritize quality over cost. Cheap or inappropriate cleaning materials can potentially damage your device’s sensitive electronic components.
Before beginning any maintenance procedure, ensure you have a clean, well-lit workspace with a flat surface. Lay down a white or light-colored towel to help you see small parts and prevent losing tiny components. Keep a small container nearby to organize screws and small pieces during disassembly. Your preparation will determine the success of your maintenance routine, setting the stage for a thorough and effective cleaning process that extends your vape device’s lifespan and maintains its peak performance.
As a final verification, double-check that you have assembled all necessary tools:
- High-concentration isopropyl alcohol
- Lint-free microfiber cloths
- Precision tweezers
- Cotton swabs
- Soft-bristled electronic cleaning brush
- Clean workspace with good lighting
Step 2: Disassemble Your Vape Device Properly
Disassembling your vape device requires precision, patience, and a methodical approach. This critical step allows you to access internal components, perform thorough cleaning, and identify potential issues that might compromise your device’s performance. Safety and careful handling are paramount during this delicate process.
Begin by powering down your device completely. If your vape has a removable battery, carefully extract it first. Remove any cartridges or attachments, placing them in a clean, organized workspace. Use your precision tweezers to gently manipulate small components, avoiding direct contact with electronic elements. Work on a white or light-colored surface to help you track and manage tiny parts effectively.
As you start disassembling, pay close attention to the connections and interfaces between components. Some devices have magnetic connections or specific locking mechanisms that require gentle, deliberate manipulation. Apply consistent, light pressure when separating parts to prevent unnecessary stress or potential damage. Take mental notes or even photographs of the device’s configuration to ensure accurate reassembly later.
Learn more about responsible vape disposal practices to understand how proper maintenance connects with responsible device lifecycle management. When disassembling, inspect each component for signs of wear, residue buildup, or potential damage. Look for:
- Discoloration on connection points
- Accumulated residue or condensation
- Visible cracks or structural weaknesses
- Corrosion on battery contacts
The key to successful disassembly is maintaining a calm, focused approach. Move slowly and deliberately, treating each component with respect. If you encounter resistance when separating parts, stop and reassess rather than forcing the connection. Some devices have intricate internal structures that can be easily damaged by aggressive handling.
To verify successful disassembly, confirm that you have:
- Completely separated all removable components
- Preserved the original configuration of parts
- Identified and set aside any components requiring special cleaning or replacement
- Created a clean, organized workspace for subsequent maintenance steps
Step 3: Clean Each Component Thoroughly
Cleaning your vape device is a meticulous process that demands attention to detail and a systematic approach. This step transforms your device from potentially grimy and residue-laden to pristine and high-performing. Thorough cleaning prevents performance degradation and extends your device’s functional lifespan.
Begin with the battery component, which requires the most delicate handling. Using a cotton swab lightly dampened with high-concentration isopropyl alcohol, gently clean the connection points and exterior surfaces. Avoid saturating the battery and ensure no liquid penetrates internal electrical components. Rotate the swab frequently to prevent redistributing dirt and use a dry microfiber cloth to immediately remove any remaining moisture.
For atomizer and coil components, precision becomes critical. Rinse removable parts with warm water, allowing them to air dry completely before reassembly. If significant residue exists, a specialized electronic device cleaning solution might offer more effective results than water alone. Use your soft-bristled brush to gently dislodge accumulated material, working methodically to prevent damage.
Learn more about responsible vape recycling techniques to understand how proper maintenance contributes to sustainable device management. When cleaning cartridges and mouthpieces, use separate cleaning tools to prevent cross-contamination. Isopropyl alcohol works exceptionally well for removing sticky residues, but apply it sparingly and precisely.
Your cleaning process should focus on these critical areas:
- Battery connection points
- Mouthpiece interior and exterior
- Atomizer threads
- Cartridge contact surfaces
- External device casing
As you clean, inspect each component carefully for signs of wear, damage, or excessive buildup. Some residues might indicate underlying issues with your device or suggest it’s time for specific component replacement. Pay special attention to areas prone to condensation and material accumulation.
To verify successful cleaning, perform these final checks:
- All components appear visibly clean
- No residual odors from previous usage
- Connection points look bright and free of corrosion
- No visible moisture remains on any component
- Surfaces feel smooth and residue-free
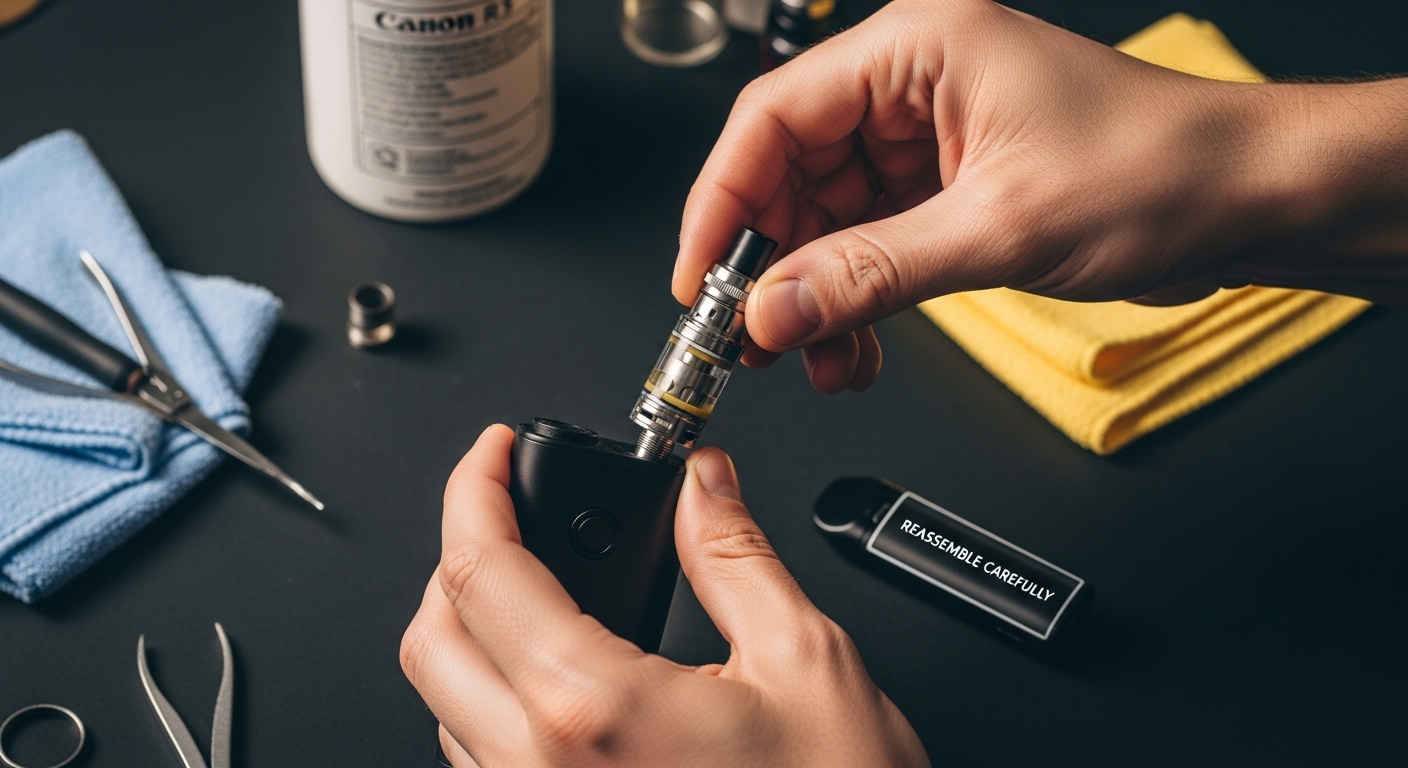
Step 4: Reassemble Your Vape Device Correctly
Reassembling your vape device is a critical process that demands precision, patience, and careful attention to detail. This step transforms your cleaned components back into a fully functional device, requiring a methodical approach to ensure optimal performance and prevent potential damage. Proper reassembly is the bridge between thorough maintenance and device reliability.
Begin by reviewing the mental snapshot or photographs you captured during disassembly. Lay out all components in the exact order they were removed, creating a visual roadmap for reconstruction. Start with the foundational elements like the battery and base connections, ensuring each piece is completely dry and free from any residual cleaning solution. Align connection points meticulously, applying gentle, even pressure to seat components correctly without forcing or misaligning them.
When reconnecting electronic components, pay special attention to the threading and contact points. Rotate pieces slowly and deliberately, feeling for the natural alignment that indicates proper connection. Magnetic connections require particularly gentle handling to prevent misalignment or potential damage to the delicate internal mechanisms. If you encounter resistance, stop and reassess rather than applying excessive force that could compromise the device’s structural integrity.
Explore our comprehensive guide on optimizing vape maintenance workflow for additional insights into professional-level device care. As you progress through reassembly, periodically check that each component sits flush and connects smoothly. Some devices have specific orientation requirements that are not immediately obvious, so take your time and remain observant.
Key considerations during reassembly include:
- Checking thread alignments
- Ensuring secure but not overtightened connections
- Verifying magnetic connections sit perfectly
- Confirming no loose components remain
- Maintaining original device configuration
The final stages of reassembly require a delicate touch. Gently press components together, listening for the subtle clicks that indicate proper seating. Rotate and slightly wiggle connections to confirm they are secure but not stressed. Your goal is a device that feels solid and integrated, with no wobbling or misaligned parts.
To verify successful reassembly, perform these final checks:
- All components are securely connected
- No gaps or misalignments are visible
- Device feels balanced and stable
- No unusual sounds when gently manipulated
- All external surfaces appear smooth and properly seated
Step 5: Test for Functionality After Maintenance
Testing your vape device after maintenance is the critical final step that confirms your careful cleaning and reassembly have restored optimal performance. This verification process serves as a comprehensive health check for your device, ensuring that all components function precisely as intended. Approach this stage with the same methodical attention you applied during disassembly and cleaning.
Initiate testing by first checking the battery connection. Insert the battery and observe its seating and electrical contact points. A properly maintained device should show consistent, smooth connection without any resistance or wobbling. Activate the device using its standard power-on method, paying close attention to the response time and initial performance indicators. Look for consistent heating and uniform vapor production as primary signs of successful maintenance.
Proceed with a series of controlled test draws, monitoring several key performance parameters. Start with shorter, gentler inhalations to assess the device’s immediate responsiveness. Note the vapor temperature, density, and flavor consistency. Any significant deviation from the device’s standard performance could indicate a maintenance issue that requires further investigation. Listen for unusual sounds like clicking, buzzing, or inconsistent activation that might suggest underlying problems with internal connections or components.
Learn more about responsible vape disposal and performance management to understand how proper maintenance connects with long-term device reliability. Examine the device’s exterior for any signs of stress, unusual heating, or structural changes that might have occurred during the maintenance process. Check that all external components remain securely fastened and aligned.
Critical testing parameters include:
- Consistent battery activation
- Uniform heating element performance
- Stable vapor production
- Accurate temperature control
- Smooth airflow
- No unusual sounds or vibrations
If you encounter any performance irregularities during testing, do not continue using the device. Carefully disassemble and review each component again, checking for missed cleaning areas or potential misalignments. Some issues might require professional inspection or component replacement to ensure safe operation.
To verify successful functionality, confirm these final criteria:
- Device powers on consistently
- Vapor production matches pre-maintenance quality
- No unusual odors or tastes
- Battery holds charge as expected
- All external components remain secure
- Device feels balanced and responds predictably during use
Here is a checklist table that outlines the key completion criteria to verify successful maintenance of your vape device after each step.
Vape Maintenance Completion Checklist
| Step | Completion Criteria |
|---|---|
| Supplies Gathered | All necessary cleaning tools and workspace prepared and organized |
| Disassembly | All components separated and configuration documented |
| Cleaning | Parts visibly clean, no odors or residue, connection points bright |
| Reassembly | Components securely connected, no gaps, device feels stable |
| Functionality Test | Device powers on, vapor production normal, no unusual sounds or odors |
Take Your Vape Experience From Maintenance to Mastery
You have just learned the secrets of step-by-step vape maintenance to keep your device working at its best. Still, you know maintenance is only half the story. What really makes your vape journey complete is choosing products designed for quality, durability, and sustainability from the very beginning. Imagine pairing your new cleaning confidence with premium, lab-tested devices that offer exceptional performance from the first draw. Why risk vape performance setbacks caused by inferior hardware or questionable manufacturing? At Shorties Disposable, every product is built for reliability and straightforward use, putting an end to frustrating residue buildup and inconsistent vapor output.
Explore our collection of lab-tested disposables and learn more about our approach to safety and device recycling. When you order through Shorties Disposable, you get more than just a premium vape. You get peace of mind with complete product transparency, innovative features, and a trusted warranty. Don’t wait to put your maintenance skills to real use. Select your next device now and see the difference that smart care and the right hardware can make.
Frequently Asked Questions
What supplies do I need for vape maintenance?
To maintain your vape device effectively, gather high-concentration isopropyl alcohol, lint-free microfiber cloths, precision tweezers, cotton swabs, a soft-bristled electronic cleaning brush, and ensure you have a clean, well-lit workspace.
How do I safely disassemble my vape device?
Disassemble your vape device by powering it down completely, removing the battery if applicable, and carefully separating components while taking note of their arrangement. Use precision tweezers to handle delicate parts and work on a clean, light-colored surface to avoid losing small pieces.
What areas should I focus on while cleaning my vape?
Focus on cleaning the battery connection points, mouthpiece (interior and exterior), atomizer threads, cartridge contact surfaces, and the external casing of the device. Ensure each component is free from residue and buildup to maintain optimal performance.
How can I test if my vape device is functioning properly after maintenance?
After reassembling your vape, test its functionality by inserting the battery and checking the connection. Activate the device, observing its heating performance, vapor production, and listening for any unusual sounds. Ensure the device responds consistently during test draws.
Recommended
- Optimize Your Vape Maintenance Workflow for 2025 Success – SHORTIES DISPOSABLE VAPE
- Understanding Safe Vape Storage: Protecting Your Products – SHORTIES DISPOSABLE VAPE
- What is Safe Disposal Vape? Understanding Responsible Practices – SHORTIES DISPOSABLE VAPE
- What is Disposable Vape Recycling and Why It Matters – SHORTIES DISPOSABLE VAPE